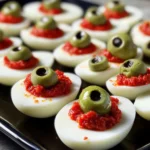
Spooky Deviled Eyeballs
If you’re looking for a fun and slightly creepy treat to serve at your Halloween party, then you’ve come to the right place! These Spooky Deviled Eyeballs are not only a feast for the eyes but also a delight for the taste buds. They’re simple to make and sure to get your guests giggling. I love how versatile they are too—perfect for busy weeknights or festive gatherings alike.
The combination of creamy yolk filling and salty olives makes these spooky deviled eyeballs irresistibly delicious. Plus, they cater to those following KETO or low-carb diets, ensuring everyone can enjoy them!
Why You’ll Love This Recipe
- Easy to Make: This recipe comes together quickly, making it perfect for last-minute party prep.
- Family-Friendly Fun: Kids will love helping out in the kitchen as they create these spooky snacks!
- Make-Ahead Friendly: Prepare them in advance and store them in the fridge until your guests arrive.
- Delicious Flavor: The creamy filling combined with the briny olives is a flavor explosion you won’t want to miss!
Ingredients You’ll Need
These spooky-ooky ingredients are simple and wholesome, making it easy to whip up this fun appetizer. Gather these items before you start:
For the Eyeballs
- 6 large eggs
- 2 tbsp. mayonnaise
- 1 tbsp. spicy brown mustard
- 3 drops red food dye (or beet juice)
- 12 medium cocktail olives (with pimentos)
For the Base
- 3 slices white bread (or 12 rice crackers)
- Salt & pepper (to taste)
Variations
This recipe is so flexible! Here are some fun variations you can try:
- Add spices: Mix in some garlic powder or smoked paprika for an extra flavor kick.
- Swap the olives: Try using green olives or even cherry tomatoes for different “eyeball” effects.
- Go vegan: Substitute mayonnaise with vegan mayo and ensure your crackers are vegan-friendly too!
- Spice it up: Add a dash of sriracha or hot sauce into the filling for those who love a bit of heat.
How to Make Spooky Deviled Eyeballs
Step 1: Boil the Eggs
Start by preheating your oven to 350°F (175°C) if you’re using bread bases. If crackers are your choice, no need to preheat! Place your eggs in a pot of cool water, covering them fully. Bring them to a boil on the stove and let them cook for about 20 minutes. After that, transfer them into cold water for 2-5 minutes. This cooling step helps stop further cooking and makes peeling easier.
Step 2: Prepare the Filling
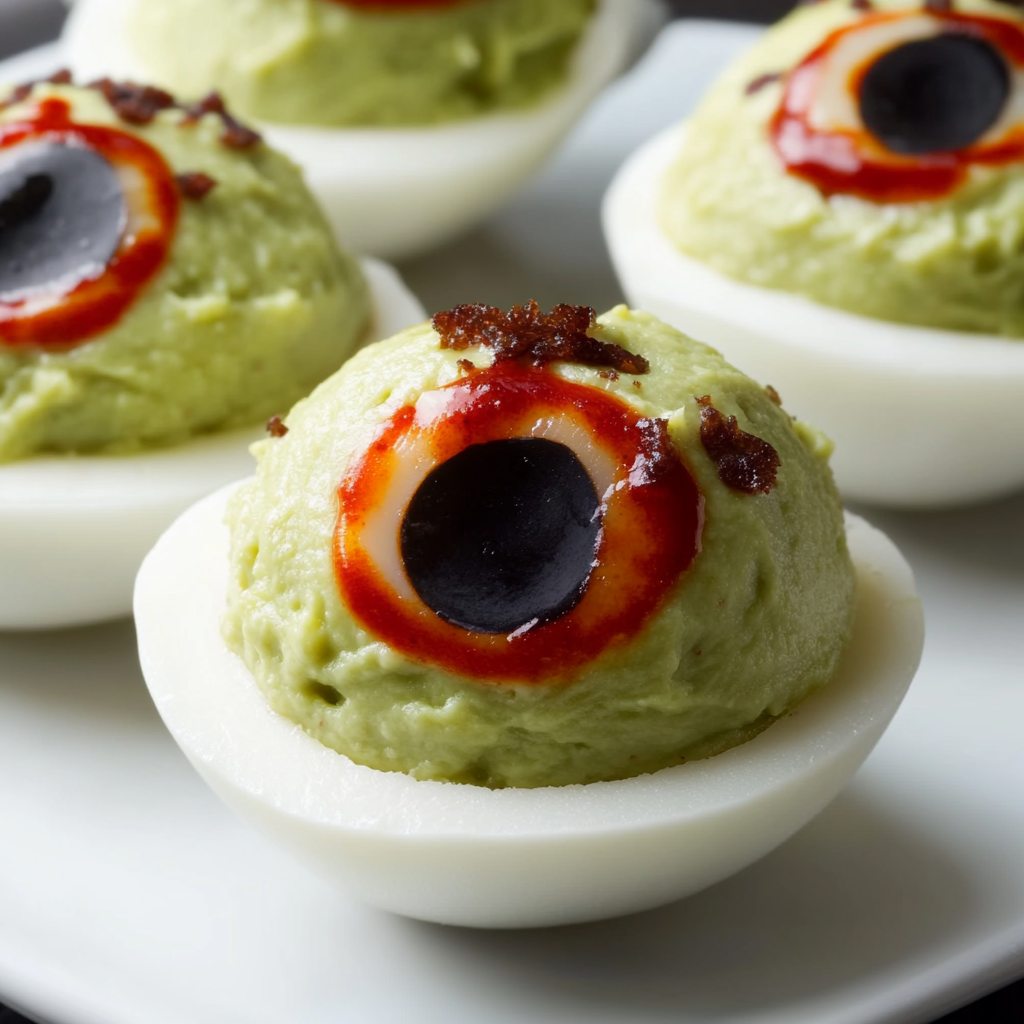
Once your eggs have cooled, slice each one in half through the center and carefully remove the yolks. Place those yolks in a mesh strainer over a bowl and push them through with a spoon—this creates a creamy texture that’s perfect for filling! Combine with mayonnaise, spicy mustard, salt, and pepper. If it looks dry, add more mayo until it reaches a thick hummus-like consistency. Lastly, add red food dye or beet juice until you achieve that eerie color!
Step 3: Toast Your Base
If you’re using bread as your base, take this moment to cut out small circles using a cookie cutter from your bread slices. Flatten those little circles into wafers and toast them in your preheated oven for about 5-7 minutes until they’re crispy.
Step 4: Create Eyeball Hollows
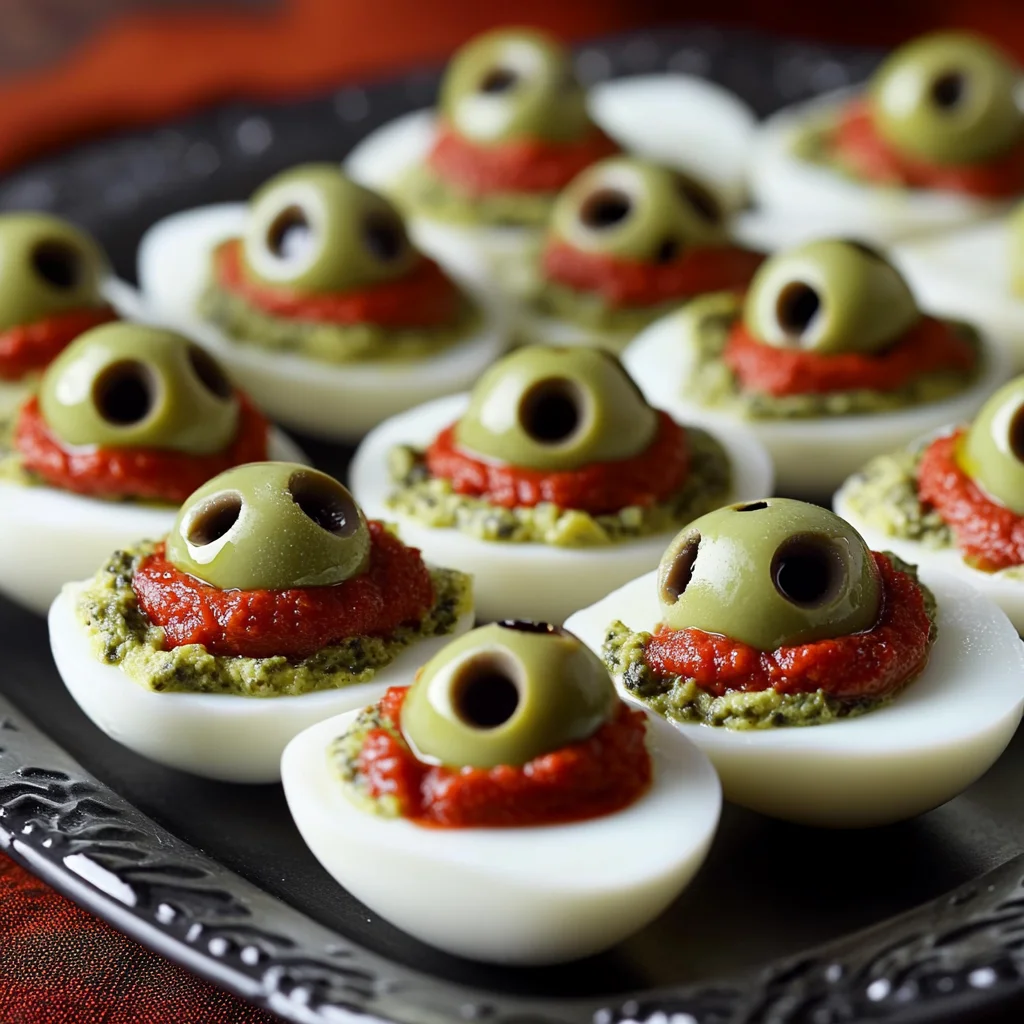
Using a standard pastry-piping tip, carefully cut an olive-sized hole in each egg half. Don’t throw away those tiny cut pieces! Save half of each piece—this will help hold an olive slice later.
Step 5: Add Olives
Slice each olive into half-inch pieces and place one slice into each egg half where you created that hollow spot. This gives it that spooky eyeball look that’s sure to impress!
Step 6: Fill ‘Em Up!
Turn each egg half over gently and fill with your yolk mixture—be careful not to overfill! Once filled, place your toasted bread circle or rice cracker on top to seal everything nicely.
Now you’re ready to serve these delightful Spooky Deviled Eyeballs at your next gathering! Enjoy watching everyone’s reactions as they dig into these deliciously creepy treats!
Pro Tips for Making Spooky Deviled Eyeballs
Creating these spooky deviled eyeballs can be a delightful experience, especially with a few insider tips to ensure they turn out perfect!
- Use fresh eggs: Fresh eggs peel easier and result in a smoother filling. This makes the overall presentation more appealing and keeps your deviled eyeballs intact.
- Experiment with spices: Don’t hesitate to add your favorite spices like garlic powder or paprika to the yolk mixture. This enhances flavor and adds a personal touch to your creation.
- Get creative with the food dye: If you prefer natural ingredients, beet juice is a fun alternative that adds both color and a hint of sweetness. Plus, it aligns perfectly with our goal of keeping things wholesome!
- Make ahead of time: Prepare the egg mixture a day in advance and store it in the fridge. This saves you time on party day and allows the flavors to meld beautifully.
- Practice piping skills: If you’re new to piping, practice on parchment paper first. A steady hand will help create those perfect eyeball shapes that will impress your guests.
How to Serve Spooky Deviled Eyeballs
Presentation is key when it comes to serving these fun appetizers at your Halloween gathering! Get creative with serving ideas that will have everyone excited to dig in.
Garnishes
- Chopped chives or green onions: Sprinkle on top for a pop of color and a fresh flavor boost.
- Sliced radishes: Use thin slices as an additional garnish around the plate for a crunchy texture that contrasts nicely with the creamy filling.
Side Dishes
- Crispy Veggie Platter: Pair these eyeballs with an assortment of crunchy veggies like carrots, cucumbers, and bell peppers. Serve with a tasty hummus dip for added variety.
- Spooky Cheese Board: Create a cheese platter featuring various cheeses, crackers, and fruits. It’s perfect for nibbling between deviled eyeball bites!
- Pumpkin Soup: A warm bowl of pumpkin soup not only complements the flavors but also keeps with the Halloween theme—cozy and delicious!
- Salad with Poppy Seed Dressing: A light salad sprinkled with poppy seeds can balance out the richness of the deviled eggs while adding some festive flair.
With these pro tips and serving ideas, your Spooky Deviled Eyeballs will surely be the hit of any Halloween gathering! Enjoy making them as much as you’ll enjoy watching your guests’ reactions!
Make Ahead and Storage
These Spooky Deviled Eyeballs are perfect for meal prep, making your Halloween gathering a breeze! You can prepare them in advance, allowing you to enjoy more time with your guests and less time in the kitchen.
Storing Leftovers
- Store any leftover deviled eyeballs in an airtight container in the refrigerator.
- They can last up to 3 days, but they are best enjoyed fresh!
- If possible, store the filling separately from the egg halves to maintain texture.
Freezing
- While it’s not recommended to freeze filled eggs, you can freeze the egg yolk mixture for later use.
- Place it in an airtight container or freezer bag, and it will keep well for up to a month.
- Thaw in the refrigerator before using and mix well before filling your eggs.
Reheating
- Reheat only if necessary; these are best served cold or at room temperature.
- If you must reheat, do so gently in a microwave for about 10 seconds at a time until just warmed through. Avoid overheating to maintain texture.
FAQs
Here are some common questions about making Spooky Deviled Eyeballs!
Can I use different fillings for Spooky Deviled Eyeballs?
Absolutely! Feel free to experiment with different ingredients like avocado or hummus for a unique twist on this classic recipe.
How long do Spooky Deviled Eyeballs last?
When stored properly, Spooky Deviled Eyeballs can be kept in the refrigerator for up to 3 days. Just make sure they’re sealed well!
Can I make Spooky Deviled Eyeballs without mayonnaise?
Yes! You can substitute mayonnaise with Greek yogurt or avocado for a creamy texture without using traditional mayo.
What’s the best way to decorate my Spooky Deviled Eyeballs?
Consider adding additional food coloring or using sliced cherry tomatoes for added spooky flair. Get creative with edible decorations!
Are Spooky Deviled Eyeballs suitable for kids?
Yes! These fun appetizers are not only delicious but also visually appealing, making them a hit among kids and adults alike!
Final Thoughts
I hope you find joy in crafting these delightful Spooky Deviled Eyeballs! They bring a whimsical touch to any Halloween party while being super tasty and easy to make. Enjoy every moment cooking and sharing them with friends and family. Happy Halloween cooking!
Spooky Deviled Eyeballs
Create spooky fun with these delicious Spooky Deviled Eyeballs! Perfect for Halloween parties—try this easy recipe today!
- Prep Time: 15 minutes
- Cook Time: 20 minutes
- Total Time: 35 minutes
- Yield: Makes approximately 12 deviled eyeballs 1x
- Category: Appetizer
- Method: Boiling
- Cuisine: American
Ingredients
- 6 large eggs
- 2 tbsp mayonnaise
- 1 tbsp spicy brown mustard
- 3 drops red food dye (or beet juice)
- 12 medium cocktail olives (with pimentos)
- Salt & pepper to taste
- 3 slices white bread (or 12 rice crackers)
Instructions
- Boil the eggs: Place eggs in cool water, bring to a boil, and cook for 20 minutes. Transfer to cold water for easier peeling.
- Prepare the filling: Slice eggs in half, remove yolks, and mash with mayonnaise and mustard until creamy, adding food dye for color.
- Toast the base: Cut out small circles from bread or use rice crackers; toast until crispy.
- Create hollows: Use a piping tip to cut holes in egg halves for olives.
- Add olives: Insert olive slices into the hollows of each egg half.
- Fill eggs: Pipe the yolk mixture into each half and top with toasted base.
Nutrition
- Serving Size: 1 serving
- Calories: 70
- Sugar: 0g
- Sodium: 85mg
- Fat: 5g
- Saturated Fat: 1g
- Unsaturated Fat: 4g
- Trans Fat: 0g
- Carbohydrates: 2g
- Fiber: 0g
- Protein: 5g
- Cholesterol: 186mg